Bush to Bonsai: Out of the Boxwood
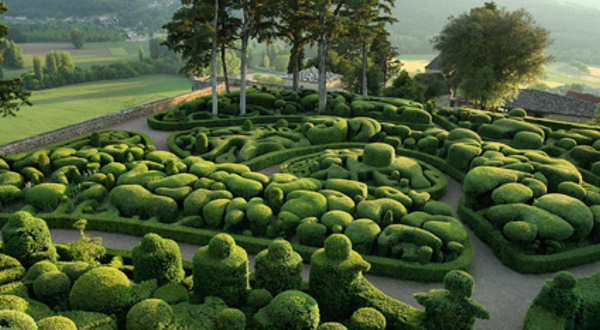
Gardens of Marqueyssac, Vézac (Dordogne), France.
(Source: Wikimedia Commons)
Boxwood have been used in landscape design for hundreds of years. With their small, deep-green leaves and ability to bud back on old wood, they are popular for hedges and topiary.
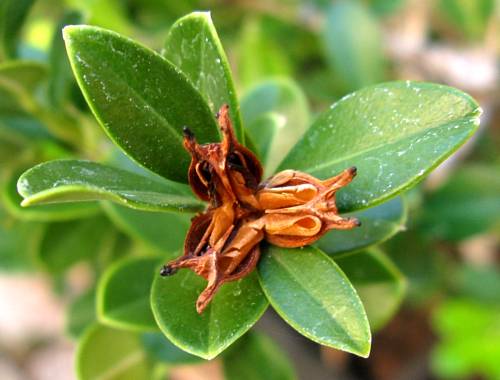
Seed pod provides contrasting color in late summer.
A closer look reveals interesting bark, shallow root systems, and hard wood – perfect for bonsai. Established bushes will flower and fruit before dropping seeds in the late summer.
Ten years ago, I rescued a neighbor's boxwood hedge that was destined for a dumpster. Of the forty trees I replanted in my yard, only twelve had character, movement, shari, and nice nebari.
I set those twelve aside for workshops and demonstrations and created a new hedge with the boring trees.
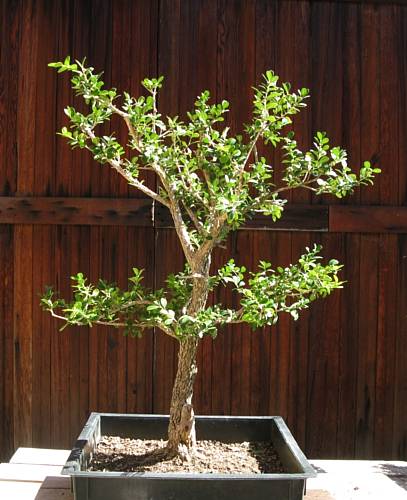
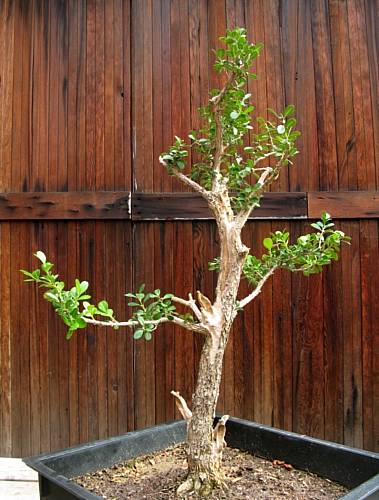
Tree wearing a tutu before trimming.
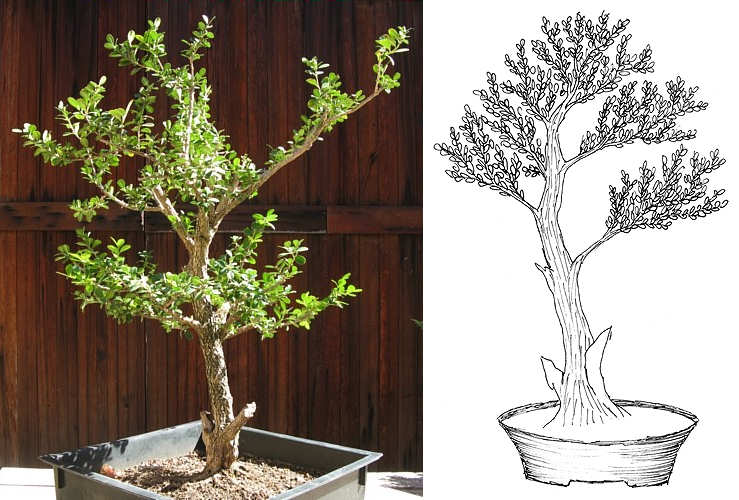
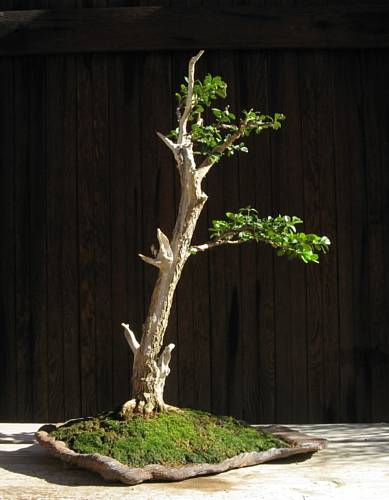
Before the Golden State Bonsai Federation's 2013 convention, I styled the worst boxwood of the bunch.
This demo tree had some challenges. Midway up the trunk, five branches emerged like a tutu on a ballerina. A little farther up, the trunk forked into two apexes. There was nothing between the spoke branches and the fork except for a little jin and shari.
The first job had been to come up with a design. There are many ways to evaluate trees when figuring out how to style them.
“Naka style,” showing off the best rootage.
My American sensei John Naka looked for the best rootage. He said, “Good rootage makes the tree stable.” Then he examined the trunk, adjusting the front to show off its taper.
In this case, the best view of the roots would also make the forked trunk more prominent. The thinner fork on the right would provide better taper of the trunk. For this design, I would remove the larger fork, leaving some jin and shari.
“Mitsuya style,” promoting the most powerful trunk.
My Japanese sensei Yasuo Mitsuya begins the design process by finding the best view of the trunk. He says, “I can improve the rootage, but the trunk is already established.” He rarely creates dead wood, preferring a lush canopy.
Turning the tree around would make the base of the trunk more interesting. The larger fork is aimed towards the front, so I would remove the smaller fork, leaving a twig at the base of the fork to create a branch.
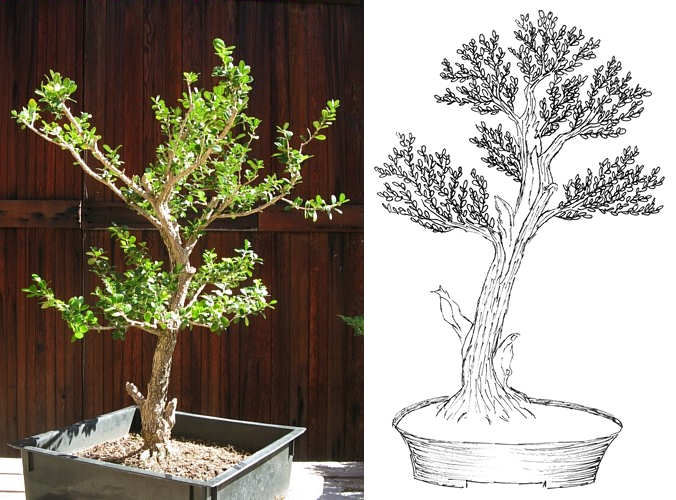
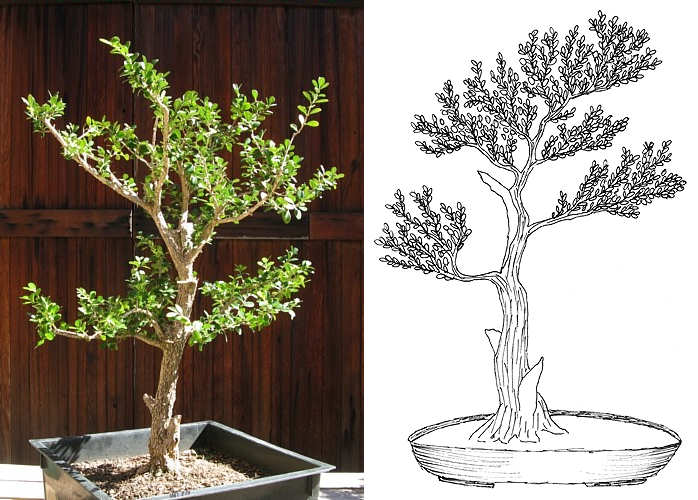
“Manning style,” featuring the dead wood.
My own approach is to show off my favorite feature of the tree – in this case, the jin and shari – so my design rotates the tree to maximize the amount of deadwood facing front. Fortunately, this angle also shows off the radiating rootage to good effect.
I would retain both forks, reducing the length and carving the diameter of the smaller ones to create one branch.
All three designs are variations on an informal upright. Any one of them was viable, so I chose to feature the dead wood.

After trimming and before carving.
First, I removed all unwanted branches, making sure to leave stubs for possible jin. This took only a few minutes.
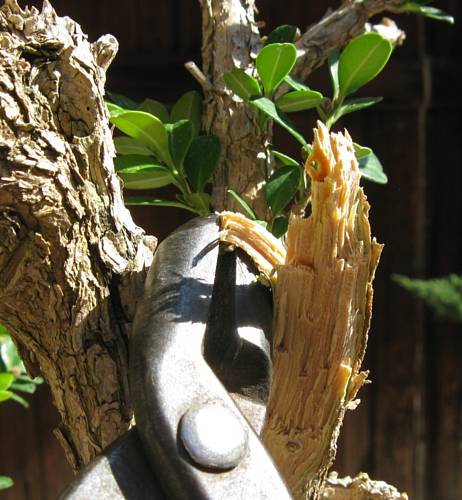
Carving taper and exposing wood grain.
I began carving the jin with hand tools, using a branch cutter to bite into the stubs. The cut was angled in the direction I wanted the taper.
Once the initial cut was made, I used pliers to rip down the excess material. The flexibility in green wood made removal easier. This method revealed the texture of the wood grain.
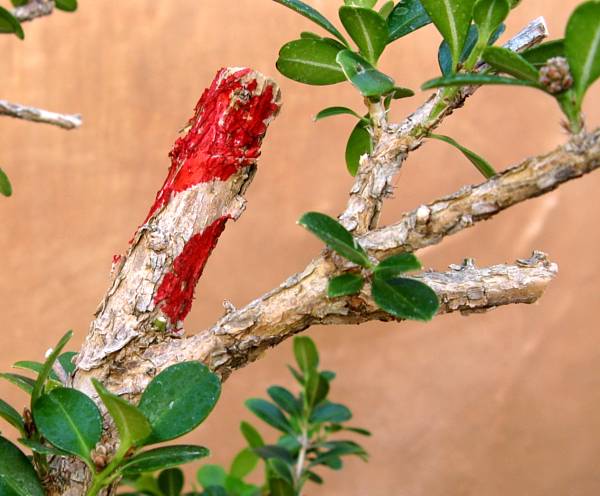
Taper and movement of new jin will follow flow of branch.
A little judicious carving can transform a thick branch into one with movement and taper.
I marked in red the portions I wanted to remove.
I tapered thinner jin and carved a channel down the shari line to add age and interest to an already old tree with character.
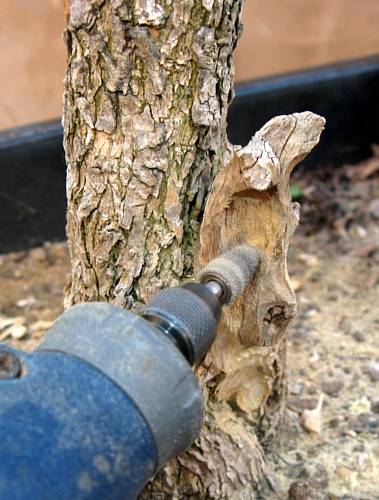
Power tools make quick work of hollowing dried wood.
I hollowed thick branches using a power tool with carbide bits.
Long, thin tips were able to squeeze into tight places where hand tools were too cumbersome.
After trimming and carving.
Not much remained of the trimmed and carved tree.
The lower left branch was supposed to frame the shari, but now it was a distraction.
It is not uncommon to make design changes during the styling of a tree.
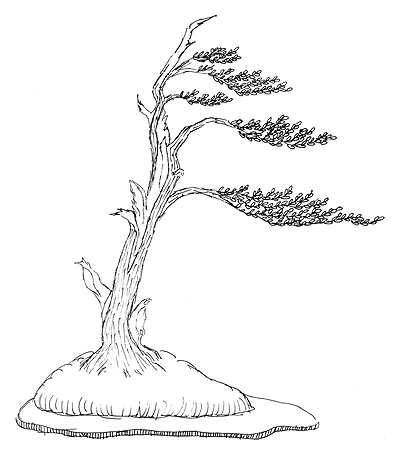
New design to show off jin and shari.
Because the jin and shari were what I liked most about this tree, I sketched another design that would make those features even more prominent.
I removed the lower left branch and leaned the tree to the right to create a windswept bonsai. Most of the jin and shari was on the windward side as if pummeled by the elements for years.
I applied a little wire to the lowest branch and anchored the wire to a nearby jin. Two other primary branches on the upper trunk were wired from branch to branch, leaving all the smaller branches to grow free (for now).
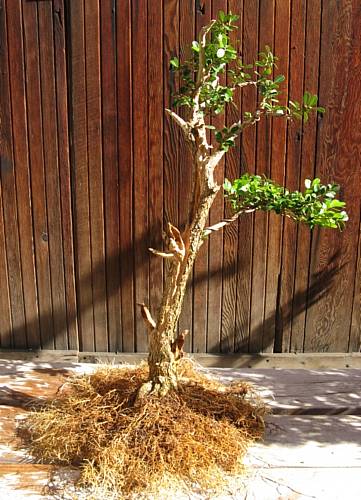
A carpet of healthy roots.
I had trimmed the roots twice in the past several years, so the root pad was nicely developed.
It also helps that boxwood normally develop a thick mass of fibrous roots. I removed less than 50% of the root mass.
Finished after five hours of fun.
After securing the tree on a beautiful slab made by Dick Ryerson, I applied moss over the inorganic potting medium before photographing the windswept tree.
My plan for this tree is to gently move it into a larger pot where I'll continue to develop the branches.
I'll also refine the dead wood by shortening the thin jin on the left and deepening the channel down the shari line. I'll add a slight bend to the top jin by steaming the wood before wiring it in position. When I move the tree back onto the slab, I'll reposition it one more inch to the left which will help balance the composition.
This little boxwood served its purpose in demonstrating the techniques that workshop participants would use on their trees. This demo tree is a long way from being a gorgeous bonsai, but after a few hours of work, the transformation was almost complete.
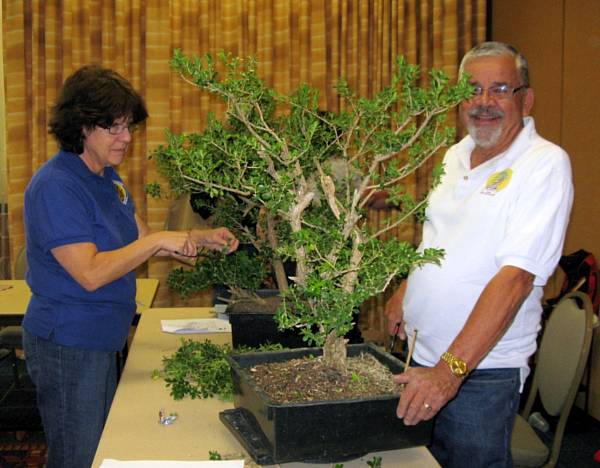
Hector and Grace Espinosa work on their trees.
On October 31, 2013, I conducted a workshop for the GSBF Convention XXXVI in Burbank, California, with the best boxwood bushes of the bunch. After choosing a design and finding the front, workshop participants began transforming their fifty-year-old trees by trimming branches to reveal the bones of beautiful bonsai. Some participants carved with hand tools while others plugged in their power tools. Wire was the final task for the morning.
I couldn't imagine a better way to spend Halloween than assisting talented and enthusiastic workshop participants. Thanks to all who took part in my “Thinking Outside the Boxwood” workshop.
In the coming months, they'll have more work to do, but that's the nature of the art of bonsai. They left the workshop with an old, partially styled bonsai, a boxwood calendar, a to-do list, and sketches of their trees.
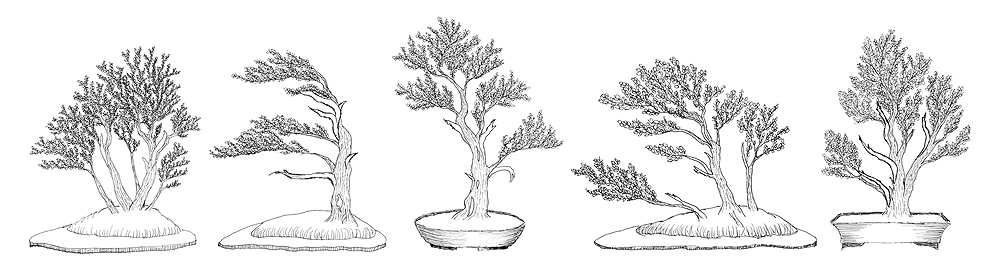
Sketches for future development of workshop trees.
All of us enjoyed the next three-and-a-half jam-packed days of workshops, seminars, and demonstrations. As I revisit wonderful memories made in Burbank, I look forward to finding inspiration, visiting friends, and getting updates on pretty boxwood bonsai at the GSBF 2014 convention in Sacramento. See you then!
Boxwood Calendar
- November - February: No specific care required in mild climates. Just treat this tree like your others. Protect from frost and cold winds in harsh climates.
- March: Apply organic all-purpose fertilizer every two weeks until October. Trim branches anytime until October.
- April - May: Best time to repot. Use a porous growing medium so the roots don't stay too wet. Size and shape of pot will vary for style of tree and your level of care (watering schedule). After repotting, do not feed for at least one month. Once new growth appears, give diluted application for one month before increasing to normal levels.
- September - October: Second-best time to repot.
Post-demo
- Finish carving jin and shari.
- Treat dead wood with lime sulfur.
- Pot tree.
- Choose appropriate pot for style of tree.
- Screen out fine particles from growing medium.
- Remove up to 50% of the root mass.
- Wire tree into place.
- Water thoroughly to flush out any fine particles.
- Keep tree in partial shade while it recovers.
- Repot every two to four years.